
TL;DR:
- Most children's book creation begins with defining the target age group and developing a core emotional truth that resonates with young readers. The process involves careful manuscript outlining, illustration, and technical formatting, with illustration taking the most time and expense. Preparing for publication requires legal steps like obtaining ISBNs and registering copyrights, while a well-planned launch over several months builds visibility and sales.
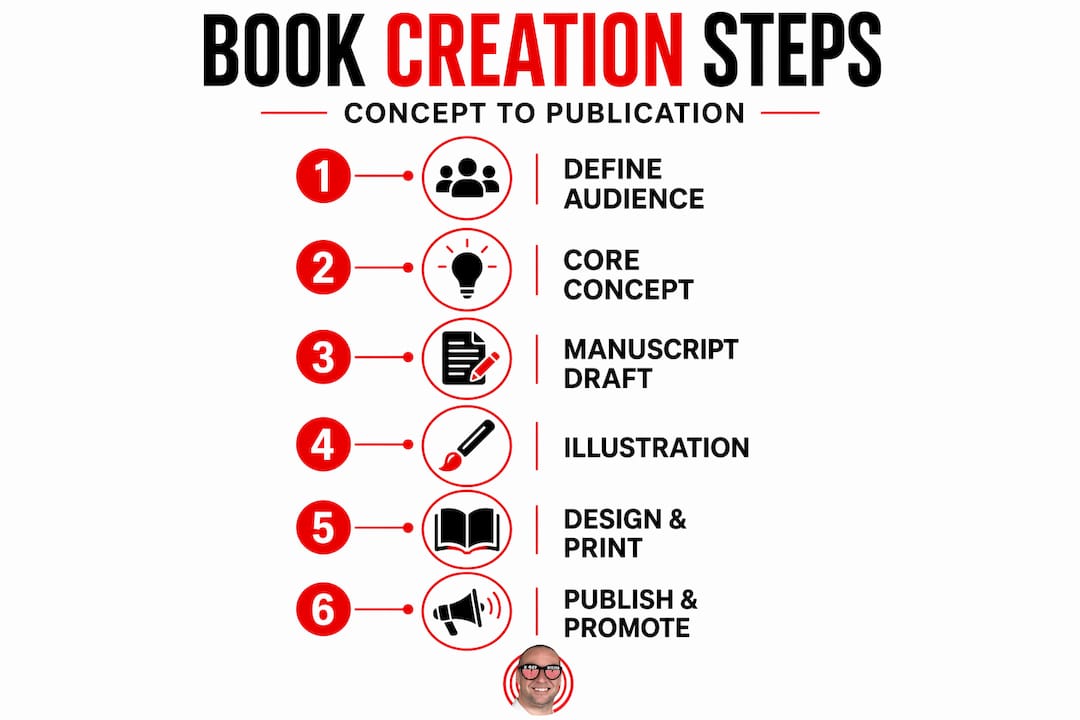
Most aspiring children's book authors share the same experience: a vivid idea, a spark of excitement, then a wall of confusion about where to start. The step by step children's book creation process looks deceptively simple from the outside. In practice, it spans audience research, manuscript drafting, illustration coordination, print formatting, legal registration, and launch planning. Get one phase wrong and every phase after it suffers. This guide walks you through the entire children's book development process, from raw concept to published book on shelves, with real timelines, modern tools, and zero guesswork.
Table of Contents
- Key takeaways
- Step by step children's book creation starts with knowing your reader
- Writing and outlining your manuscript step by step
- Illustrating and designing your book
- Preparing for publication
- Launching and promoting your children's book
- My honest take on what most first-timers get wrong
- Explore children's books at Markwatsonbooks
- FAQ
Key takeaways
| Point | Details |
|---|---|
| Audience focus comes first | Defining your target age group shapes every creative and design decision before you write a single word. |
| Manuscript quality drives illustration quality | A polished, well-outlined script reduces costly revisions during the illustration phase. |
| Illustration takes the most time | The illustration and design phases span 6 to 12 months and represent the largest portion of your timeline. |
| Publication needs legal groundwork | ISBNs, copyright registration, and metadata optimization are non-negotiable before your book goes live. |
| Launch planning starts early | Build your reader base and marketing plan before your book releases, not after. |
Step by step children's book creation starts with knowing your reader
Before you write one word of your manuscript, you need to know exactly who you are writing for. Starting with a clear target age group ensures that your storytelling, vocabulary, and design choices are all pulling in the same direction.
Here is how the major age categories break down:
- Board books (ages 0 to 3): Simple concepts, 100 to 300 words, bold images, minimal text per page.
- Picture books (ages 3 to 8): The classic format. Usually 32 pages, 500 to 800 words, illustrations on every spread.
- Early readers (ages 5 to 8): Short chapters, large font, controlled vocabulary, approximately 1,000 to 2,500 words.
- Middle grade (ages 8 to 12): Longer narratives, chapter structure, 20,000 to 50,000 words, illustrations optional.
Each category demands a completely different approach to character, conflict, and visual tone. A picture book about a child overcoming a fear of the dark lands differently when written for a 4-year-old versus a 7-year-old. The 4-year-old needs comfort and simple reassurance. The 7-year-old can handle a bit of suspense.
Once you know your age group, build your core concept around a single emotional truth. Children connect to feelings, not plots. Loneliness, courage, belonging, curiosity. Pick one and make every scene serve it.
Pro Tip: When developing your character, ask yourself: does this child feel real enough that a 6-year-old could imagine being them? If your answer requires explanation, simplify the character.
Your vocabulary must match your reader's world, not yours. Reading level tools like the Flesch-Kincaid scale can help you check this, but the fastest test is reading your manuscript aloud to an actual child in your target age group and watching where they disengage.
Writing and outlining your manuscript step by step
A strong manuscript is the blueprint your illustrator works from. Treat it that way. Rushing into illustration with a weak script is one of the most expensive mistakes a first-time author makes. The step by step book outlining process for a picture book looks deceptively short, but every word carries enormous weight when your total count is under 800.
Follow this sequence for writing and polishing your manuscript:
- Write a scene-by-scene outline. Map each page turn as a single beat. Most picture books have 14 spreads plus front and back matter. Know what happens on each one before you write prose.
- Draft your full manuscript. Write freely without editing. Get the whole story out, even if it runs long.
- Cut aggressively. Anything a picture can show, remove from the text. The illustration will carry that weight.
- Add rhythm and repetition where appropriate. Repeated phrases create anticipation. Children love hearing what comes next before it arrives. Think of it as the reader leaning forward.
- Read the manuscript aloud, timed. A picture book read-aloud should take 3 to 5 minutes. If it runs longer, cut more.
- Revise for illustration cues. Leave space in the text for visual storytelling. Your illustrator needs room to add action, expression, and setting.
- Proofread with fresh eyes. Wait at least 48 hours after your final revision before a proofreading pass. Errors you missed on day one become obvious on day three.
Pro Tip: Read your manuscript to someone who has never heard it. Watch their face, not their words. Their expression at each page turn tells you more than any critique.
For picture books specifically, the emotional payoff on the final spread is everything. Your ending must feel earned and satisfying, not just conclusive. Readers should close the book with a feeling, not just a resolution. For deeper storytelling craft, check out this children's book writing guide from Markwatsonbooks.

Illustrating and designing your book
Illustration is where your story becomes a world. It is also where the children's book development process spends most of its time. Expect 6 to 12 months for the illustration phase and 1 to 3 months for final editing, design, and formatting.
Working with a professional illustrator
A professional illustrator needs a detailed brief before touching a single sketch. A strong illustration brief includes your full manuscript, character descriptions with physical references, a color palette direction, scene-by-scene visual notes, and your timeline and budget. Vague briefs cost money. Every round of revisions adds time and expense.
Character consistency is non-negotiable. If your protagonist has curly red hair on page 3 and straight brown hair on page 15, you lose the child's trust in the story. Provide visual references and request character sheets before full illustration begins.
Using AI illustration tools
AI-assisted workflows can dramatically shorten timelines. Some creators publish in as little as 7 days using AI tools. But there are real legal and quality considerations.
Amazon KDP requires disclosure of AI-generated text and images. Content created substantially by an AI tool must be flagged during the publishing process. Additionally, protecting AI-generated work requires embedding significant human creative authorship. A book generated entirely by AI with no original human creative contribution has weak copyright standing.
| Approach | Timeline | Cost range | Copyright strength |
|---|---|---|---|
| Professional illustrator | 6 to 12 months | $2,000 to $10,000+ | Strong |
| AI with human creative input | 2 to 8 weeks | $50 to $500 | Moderate (with disclosure) |
| DIY illustration | Variable | Low cost | Strong if original |
Design essentials for print
When formatting for print, every technical spec matters:
- Trim size: Common picture book sizes are 8.5 x 8.5 or 8 x 10 inches.
- Bleed: Set at 0.125 inches so full-color backgrounds do not leave white edges after cutting.
- Resolution: 300 DPI minimum for all images to avoid blurry print output.
- Color space: Use CMYK, not RGB. RGB looks vivid on screens but shifts noticeably in print.
For more detailed guidance on visual standards, this practical illustration guide from Markwatsonbooks covers every technical step.
Pro Tip: Order a physical proof copy before you approve the final print file. Colors always shift between screen and paper. What looks warm and golden on your monitor can print muddy and dull.
Preparing for publication
Getting your book production-ready involves more than uploading a PDF. These are the legal and technical steps you cannot skip.
ISBNs and copyright: Amazon KDP offers free ISBNs for paperbacks and hardcovers, but these ISBNs lock your book to KDP distribution only. If you plan to distribute through IngramSpark or brick-and-mortar retailers, purchasing your own ISBN from Bowker preserves your publishing rights across all channels. Register your copyright with the U.S. Copyright Office for an additional layer of legal protection.
Print costs and pricing:
| Platform | Cost per book (32-page color) | Royalty structure |
|---|---|---|
| Amazon KDP | $1.34 to $3.59 | 60% minus print cost |
| IngramSpark | $3.50 to $5.00 | Varies by retailer discount |
KDP royalties range from 35 to 70 percent for eBooks and approximately 60 percent minus printing costs for print editions. Color picture books have tighter margins than black-and-white chapter books, so set your retail price realistically.
Metadata optimization: Keywords, categories, and book descriptions on Amazon directly affect how discoverable your book is. Treat your book description like a sales letter. Use searchable keywords your readers actually type. Choose the two most precise Amazon categories available for your book, not the broadest ones.
Cover design: Your cover is the single highest-impact marketing asset you own. Hire a professional cover designer who understands children's book conventions if illustration is not your strength. For specific cover design strategies, this guide on engaging kids' book covers is worth bookmarking.
Launching and promoting your children's book
A strong launch does not happen in a week. It builds over months. Here is how to execute it well:
- Create an advance reader copy (ARC) program. Send free copies to teachers, librarians, parent bloggers, and children's book reviewers 4 to 6 weeks before your release date. Honest reviews on Amazon and Goodreads at launch dramatically improve visibility.
- Build your platform before launch day. An Instagram account, a simple author website, and an email list of even 200 engaged followers outperforms zero presence at launch.
- Plan a launch week promotion. A temporary price reduction, a giveaway, or a virtual reading event creates momentum in the first 7 days, which matters for Amazon's algorithm.
- Pitch to schools and libraries. Children's book authors often overlook institutional sales. One school bulk order can match months of individual sales. Prepare a one-page educator guide to accompany your pitch.
- Collect and respond to reviews. Thank readers publicly. Engage with parents who post about your book. This builds the kind of warm community that turns a single book into a series following.
Pro Tip: Schedule your social media content for the first two weeks of launch before your book releases. When launch week arrives, you will be busy handling logistics. Pre-scheduled posts keep your online presence active without draining your energy.
My honest take on what most first-timers get wrong
I've watched dozens of aspiring authors sprint toward the illustration phase before their manuscript was truly ready. It is the single most common and costly mistake in this process. You cannot un-ring that bell. Once an illustrator builds your visual world, changing the story requires expensive revisions or starting over entirely.
In my experience, the authors who get the best results spend twice as long on their manuscript as they think they need to. They read it aloud to real kids. They get feedback from educators. They cut scenes that slow the pacing even when they love those scenes personally. The manuscript work is unglamorous, but it is the foundation everything else stands on.
On AI illustration: I think it is a genuinely useful tool when used thoughtfully, not a shortcut for skipping creative development. The creators who do it well still spend real time developing their characters, their visual tone, and their story arc. They use AI to execute a vision, not to generate one.
And finally: think long-term about your author brand from day one. A single children's book is a nice achievement. A series with a consistent character and visual identity is an asset that compounds over years.
— Mark
Explore children's books at Markwatsonbooks

If you are in the middle of your own creation process and craving inspiration from a published author who has walked this path across multiple genres, Markwatsonbooks is worth a visit. Mark Watson's children's book collection showcases what thoughtful storytelling and strong visual design look like in finished form. Browsing real published work is one of the fastest ways to calibrate your own creative instincts. You can also explore the full book catalog for a wider view of how Mark approaches character, voice, and audience across different genres. Let the work speak to you and let it push your own project forward.
FAQ
How long does it take to create a children's book?
The full timeline spans roughly 9 to 18 months from concept to publication. The illustration phase alone typically takes 6 to 12 months, with formatting and final production adding 1 to 3 months on top.
Do I need an ISBN to self-publish a children's book?
You need an ISBN for distribution, but Amazon KDP provides free ISBNs for print books. If you want wide distribution beyond KDP, purchasing your own ISBN from Bowker gives you full control across all retail channels.
Can I use AI to illustrate a children's book?
Yes, but Amazon KDP requires you to disclose AI-generated content during the publishing process. Significant human creative authorship strengthens your copyright claim and improves the overall quality of the finished book.
How many words should a picture book be?
Most picture books for ages 3 to 8 run between 500 and 800 words. The text should leave room for illustrations to carry the visual storytelling, so shorter is almost always better in this format.
What trim size should I use for a children's picture book?
The most common trim sizes for picture books are 8.5 x 8.5 and 8 x 10 inches, formatted with 0.125-inch bleed and all images at 300 DPI in CMYK color space for professional print output.